Make iced biscuits like a pro
4 tips to make the perfect iced biscuit with royal icing
4/4/20255 min read
Want to create beautiful iced biscuits?
4 things you need to know to start decorating biscuits like a pro.
1. The Perfect Biscuit Base
You need a sturdy, flat biscuit that won’t spread too much while baking. When choosing a biscuit recipe:
Choose a biscuit with a firm texture – Soft biscuits can crumble under icing. My go to recipe is this lovely lemon biscuit recipe, which goes perfectly with my tangy lemon icing.
Chill the dough before baking – This helps prevent spreading and keeps your shapes crisp.
Roll dough evenly – If biscuits are too thin, they may become brittle; too thick, and they might not hold their shape well. To get the perfect evenly rolled dough, I like this rolling pin with guides - I tend to go for between 5 and 8mm.
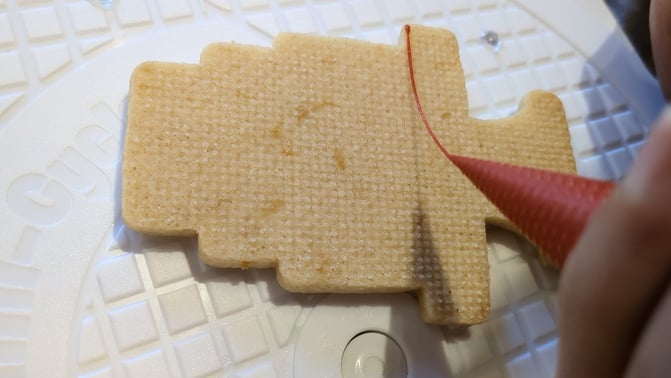
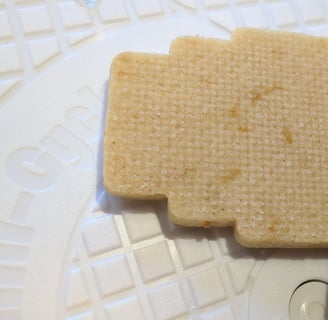
Use a perforated silicone baking mat - this is hands down THE BIGGEST GAMECHANGER I've found for getting perfect no spread biscuits. It grips onto the base of the biscuits, making a subtle waffle affect on their base. I use these - silicone baking mat.
2. Essential biscuit decorating tools
Piping bags – You can choose disposable or reusable. If choosing disposable, to start with you don’t need piping tips – you can just snip the end of the bag to the desired size. Pro tip: Chose bags that aren’t too stiff and where the seam doesn’t stick out too much otherwise it will create an uneven piping hole and the icing might not come out smoothly. I like these ones.
Piping tips – If you do opt for tips, if I was to buy just 2 tips, I’d buy two small round tips (like Wilton #1 or #2) which are perfect for fine details. I like ones without seams like these.
Scribe tool or toothpick – For getting rid of bubbles, getting your icing just where you want it, and fixing mistakes. I also use it to add food colouring to the icing a you generally want to start with really tiny amounts. Sometimes I also use it to give the iced biscuit a good shake to settle the icing.
A warm breeze – I LOVE my dehydrator – this is the one I use at 35 degrees Celsius for about 2 hours– this has transformed my icing from dull, matt and pitted, to shiny smooth and full. Seriously it is a game changer. Also it is amazing as a space efficient rack for cooling biscuits. Alternatives include a fan oven at the lowest possible temperature (I suggest using a thermometer to aim for 35 degrees) or you could try a fan heater or get creative with other combinations such as a fan infront of a radiator – needs must! But if you want to ice like a pro, and potentially at volume, a dehydrator is the way to go. It also speeds things up no end – dry biscuits in 2 hours vs. overnight, and you only need to wait about 30 minutes between layers.
3. Royal Icing Consistencies
This is the tricky one, and single handedly THE MOST CRITICAL aspect of successful biscuit decorating. It is also more forgiving that many tutorials and information online make it seem – to be truthful, there is no better way to learn than trial and error – I have emptied, adjusted then re-bagged many bags of icing until they were the right consistency.
Outline consistency – A medium-thick icing that holds its shape. Used for outlining designs before flooding. This one is pretty flexible – if lines drawn in the icing settle around 10-20 seconds, you should be fine. I don’t like it too thick as it can make the outline more obvious against the flood and I prefer not to see the outline.
Flood consistency – A thinner icing that spreads smoothly to fill the outlined areas. If this one settles in between 2-10 seconds, give it a go and see how it works for you!
Detail consistency – A very thick icing used for lettering, patterns, and fine details. This one I like very thick – generally the way the icing comes out of the mixer works well. How thick depends on the size of the hole/piping nozzle, so you may have to adjust this one – if it is too thick for a tiny nozzle, you’ll find it hard to pipe, you can get away with thicker icing the bigger the hole.
4. The Basic Biscuit Decorating Process
Once you have your icing ready, follow these steps to decorate like a pro:
Outline the biscuit – Use thicker icing to pipe an outline around the edge. This acts as a barrier to keep the flood icing in place.
Flood with thinner icing – Fill in the outlined area with flood icing. Use a toothpick or scribe tool to push icing into corners and remove air bubbles.
Let it dry – Allow the base layer to set for 20-30 minutes in a dehydrator at 35 degrees.
Add details – Use thicker icing to add patterns, lettering, or extra designs once the base layer is pretty dry.
Tip: If layering colours and not using a dehydrator, its best to let the first layer dry before adding another to avoid colours bleeding into each other. In the dehydrator, I’ve actually never had that problem so I just wait 20-30 mins before going in with the details. I don't like the icing to be 100% dry as it can suck the moisture out of the layer on top creating craters - MY NEMESIS!
Troubleshooting: Common Mistakes & How to Fix Them
Icing too runny? Add a little more icing sugar to thicken it.
Icing too stiff? Add a few drops of water to loosen it.
Colours bleeding? Make sure the base layer is dry before adding more icing.
Air bubbles? Pop them with a toothpick or scribe tool before the icing sets. Did you use a beater or a whisk? Try using a beater next time to make less bubbles. Also you could try tapping the bowl of icing before bagging to bring bubbles up to the service.
Icing colours look mottled or the colour looks like it is separating. There are two potential reasons – using too much food colouring (I also find some colours worse than others – blue and green are my troublesome colours for this) – and/or the biscuit didn’t dry quickly enough. Solution: try less food colouring next time, a different food colour brand may also help. And try using a dehydrator.
Icing is not drying smooth/is drying with craters or pits. You may not have used enough icing – be generous, but not so much that it floods over your outline lines. Also make sure your icing is not too thick. Finally, you’ve probably guessed it – the dehydrator helps icing to dry smoothly, shinily, and without craters. If you don’t have a dehydrator, try one of my other suggested fast drying methods e.g. the oven.
Icing too light? Leave the colour to rest for a few hours and see how much it darkens on its own before adding more food colouring. Adding too much food colouring an affect the taste and final finish of the icing.
Icing too vibrant – you’ve put too much food colouring in – try adding some icing whitener to lighten it up. Or you could add more icing sugar and then thin out again to the desired consistency if required. Video here.
Icing has crusted over- pour a tiny bit of water over the crusted top and let sit for 10 seconds to soften. Slowly mix water into icing and the crust will dissolve - essential to avoid clogging up your piping tip! Video here.
With a bit of trial and error, you’ll be creating beautiful biscuits in no time. If you’re looking for inspiration, check out The Biscuitery’s latest designs at https://www.biscuitery.co.uk/instagram or order a batch to see professional biscuit decorating in action! Happy decorating!
Key links
Email us here
Join our Mailing List
bakehouse@biscuitery.co.uk
© 2024. All rights reserved.